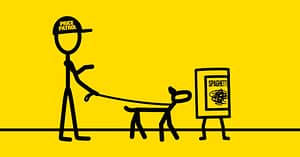
As you all may know I am not a great artist so thought this may help me a little to improve on my stick figure Pak’n Save man.

Sketch your furbaby like a pro
It doesn’t take a skilled artist to draw a picture of your dog. Drawing a dog is not difficult and it’s a fun and satisfying activity and way to spend your time at home. Once armed with a little know-how and some good quality pencils, a rubber and a sketch pad, you’re ready to go.
Learning the basics of dog sketching will give you the confidence and ability to draw any breed of dog whether it be a Newfoundland, Clumber Spaniel, Pug, Labrador, Bulldog or Rescue. It can be an enjoyable and creative way to create a loving and lasting memory of your beloved pet.
Draw in the shapes
Sketching in the basic shapes is the starting point for most drawings. This means using circles and ovals to create an outline of all the different shapes found in the dogs face and body, once you have drawn on the basic shapes, the next step is to refine and smoothen out the shapes until you have a clear and rounded outline of your dog, complete with ears, feet and snout and representative of the dogs shape, size and form.
Add detail and start shading
When you have a complete outline of your dog’s body, start adding in the details such as the dogs’ facial features. Now this is done before you move on to shading you need to carefully erase any of the guideline shapes that you drew initially as a template to help you draw the more detailed outline of your dog. Once you have erased this template and you are left with just a clean outline, you can start shading in the dogs’ fur and features. You should use a darker pencil for the blacker parts of the dog such as the eyes or nose.
Add in coat texture
This step involves sketching in your dogs’ fur, so it will depend on the look of your dog. Whether the fur is short, matted or long, you will want to use directional strokes when shading, and not get caught up in trying to draw every individual hair. This is not only impossible, but it will overwork the drawing and you are likely to end up with an undefined block of colour.
Applying more pressure to the pencil will help you layer the tone and pick up on details in the fur. You can use a darker coloured pencil to help add in more detail, texture and to highlight any contours.
Add in the finishing touches
Once you have finished the coat and are happy with the shading and texture of it, start adding in your final details. Gently stroking over different areas of the shaded fur with a kneaded eraser can help the coat look much more life-like as it helps add in finer details by removing some of the graphite, you will want to use a kneaded eraser to gently stroke over the areas you wish to add more texture too. Getting the fur right can take a long time and require a lot of patience, so you will need to keep working on it and refining it until you are happy with the finished result.